Monday, December 22, 2014

Crock-Pot Sticky Chicken

Today I had the day off work as the start of my Christmas break. My vacation activities included a doctor's appointment, picking up my child from swim practice and taking her to her friend's house, a two-hour drive to get my brother-in-law from the airport and take him to his mother's, a trip to Aldi and a full cart of groceries to buy and put away, three days' worth of dishes to wash, the whole house to vacuum, and supper to make. How relaxing!

As you can imagine, when it was time to make dinner I was awfully glad I had a Crock-Pot meal planned. This one was as easy as most slow cooker meals, but tasted even better thanks to the final few minutes of oven-broiling that turned the sauce into a sweet, crispy crust.  The thighs were great, but I'm sure any type of chicken you like would be fine.


Crock -Pot Sticky Chicken
Prep time: 5 min  Cook time: 4 hrs
Serves 6

3 lbs chicken thigh
3/4 cup brown sugar, divided
1/4 cup soy sauce, divided
1 tsp ground ginger
4 cloves garlic, minced
1/2 tsp cayenne
1/4 cup tomato paste
1/4 cup water

Combine 1/4 cup brown sugar, 2 tablespoons soy sauce, ginger, and garlic in the slow cooker. Add chicken and stir to coat evenly. Cook chicken for 4 hours on low or until done. 

Meanwhile, combine remaining 1/2 cup brown sugar, 2 tablespoons soy sauce, water, and tomato paste to create the sauce. When chicken is done, place on a lined cookie sheet and brush all sides with sauce.

 Broil in the oven for about 5 minutes or until desired crispness.  

Wednesday, December 17, 2014

Thai Delight

I have been looking for a new perfume for years. Every time I find one I like I ask my husband if he likes it, and every time he says the same thing, "I don't know."

Soooo frustrating! How can you not know if you like something? We went shopping tonight and he said that about half a dozen different perfumes, so I was getting pretty annoyed. When we got hoe, the house still smelled delectably of the amazing dinner we had. His comment? "Man, that still smells good! You should get some perfume that smells like this!"

He may not know what perfume he likes, but he sure does appreciate a good dinner, and this is definitely a good one!


Thai Delight

Total time: 15 min
Serves 4

4 cups cooked Jasmine rice
2 Tbs oil
1 cup green onions, finely chopped
2 garlic cloves, minced
1 tsp crushed ginger
12 oz shrimp, peeled and deveined
1 bag (16 oz) frozen stir fry veggies
3 Tbs Thai pesto*

2 Tbs soy sauce
1 Tbs fish sauce
3/4 cup coconut milk
2 tsp honey

1/4 cup chopped cilantro, if desired

In a wok, fry the green onions, garlic and ginger in oil until fragrant, 1-2 minutes.  Add the vegetables and shrimp. Stir fry till veggies are crisp tender and shrimp is pink.


Add the pesto, soy sauce, fish sauce, coconut milk and honey. Allow to simmer for 5 minutes. Serve over rice. Garnish with chopped cilantro, if desired.


*If you have trouble finding Thai pesto in the store, you can easily make your own with this quick and easy recipe!

Thai Pesto
1 bunch cilantro
1/4 cup peanut butter
3 cloves garlic, minced
3 Tbs extra-virgin olive oil   
2 Tbs minced fresh ginger
1 1/2 Tbs fish sauce
1 Tbs brown sugar
1/2 tsp cayenne pepper


Combine all ingredients in a blender and puree till smooth.  This makes more than you will need for the Thai Delight recipe, but you can easily freeze the rest for later.

Sunday, December 14, 2014

Customizable Pudding Cookies

It's cookie-baking time! I am so excited about Christmas this year. I spend every other year up in Indiana, visiting my family, which is nice, but it means I don't get to celebrate much at home. I don't usually decorate or bake or even do much shopping on the years I go up North, so the years I stay home I really look forward to all those traditions.

I was definitely in the Christmas mood this year and I have to admit I went a little crazy. I spent several days (and more than several dollars) shopping for decorations and decking every inch of my home for Christmas, I spent hours perusing Pinterest for the perfect holiday menu, and I spent the entire day yesterday making batch after batch of scrumptious Christmas cookies in every variety imaginable. Here's the result!


My favorite cookies ended up being the two different kinds of pudding cookies I made, so I wanted to share this versatile cookie recipe with you right away so you can make your own batch of yummy treats!  The basic recipe is always the same, but you can choose your own flavor of pudding and pick any combination of add-ins to design your own unique creation!


Customizable Pudding Cookies
Prep time: 15 min  Bake time: 10 min
Serves 36

3/4 cup unsalted butter, at room temperature
3/4 cup brown sugar
1/4 cup granulated sugar
1 (3.4 oz) pkg white chocolate instant pudding mix
2 large eggs, at room temperature
1 tsp vanilla extract
2 1/4 cups flour
(11.25 oz - weigh for best results) 
1 tsp baking soda
1/2 tsp salt
1 1/2 cups chopped Winter Oreos (the kind with red cream)

1/2 cup white chocolate chips
1 cup
Andes Peppermint Crunch Baking Chips


Preheat oven to 350 F.  For best results, use an oven thermometer to verify the accuracy of your oven temperature.  It may be off by as much as 50 degrees and that will significantly affect your results!

In as medium bowl, whisk together baking soda, salt and flour.  This thoroughly incorporates the leavening agent so your cookies bake evenly.  Set aside.

With an electric mixer, cream together butter and sugars, 1-3 minutes.

Beat in dry instant pudding mix.  Add eggs and vanilla and beat until well-mixed.


Add flour mixture and beat just until incorporated.  Do not overbeat! You should still see a little bit of visible flour here and there. Overbeating will ruin the texture your cookies.

Gently stir in Oreos, white chocolate chips, and Andes Peppermint Crunch baking chips just until incorporated. (What that picture-perfect look you see in all those blog pics?  Save a few of the mix-ins and press them into the top after rolling the dough into balls.)


Refrigerate dough for at least 15 minutes. This keeps the dough from spreading too much in the oven.

Roll into 1" balls and place 2 inches apart on a cookie sheet that is either greased or lined with parchment paper or a Silpat. (Can we take a minute to talk about Silpats? If you don't have one, go buy one right now! They are so incredibly useful. They function as a washable, reusable, nonstick pan liner and can be used just about any time you would use grease, foil, or parchment paper. I bought some brand-name ones for about $25 each, then I bought some generic ones for $5 at Aldi and they both work exactly the same.) 


Bake at 350 F for 8-10 minutes. Cookies should come out of the oven when the edges are slightly golden, the top is puffy but no longer shiny, and the cookie looks a little underdone.

Let cookies cool on the pan for 2 minutes (this finishes the cooking process,) then transfer to a cooling rack.

Chocolate Cherry Variation
For these, I followed the recipe above, but I used chocolate pudding mix instead of white chocolate. I omitted the Oreos and the peppermint chips and used a 9 oz bag of Nestle's DelightFulls Cherry Filled morsels along with 1 cup of holiday striped white chocolate morsels. They were awesome! Feel free to try any combination of baking chips you like. The have several varieties of these filled chips and I fully intend to try all of them!

Saturday, November 15, 2014

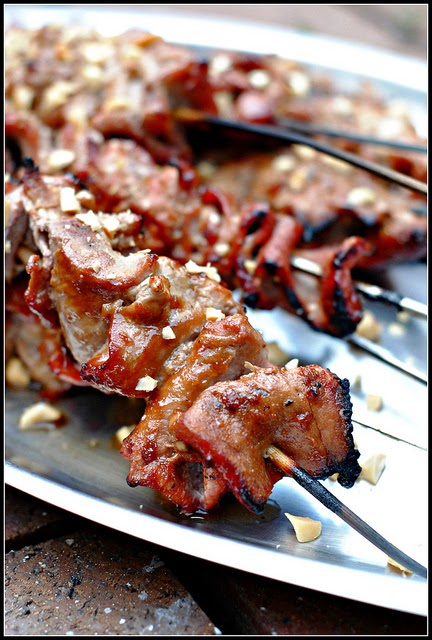
Pork Satay

So it's only November, but the polar vortex has swept across the country, and it is freakin' cold outside here! Much to my dismay, I realized about 5 minutes before it was time to start dinner that the meal on my menu was meant to be cooked on the grill--outside. Yikes.

Fortunately, because the pork is sliced so thin, the cook time on these awesome pork skewers is a whopping 6 minutes, short enough I could stay out there the whole time without turning into a popsicle. Thin slices and short cook times also mean super tender meat, and the peanut sauce is to die for! In fact, I might start making batches of this sauce to keep in the fridge for multi-purpose dipping. Since I was grilling, I also skewered up some green peppers and onions and tossed those on the barbie. They took a few more minutes than the pork, but not long at all. The dipping sauce was great on them, too.


Pork Satay
Prep time:15 min  Cook time:6 min
Serves 4

1 lb pork tenderloin, partially frozen

Sauce:
1 small onion, chopped
1/4 cup brown sugar
1/4 cup water
3 Tbs soy sauce
2 Tbs creamy peanut butter
1-1/2 Tbs canola oil
2 garlic cloves, minced
1/4 tsp ground ginger


In a small saucepan, bring all sauce ingredients to a boil. Reduce heat; simmer, uncovered, for 10-12 minutes or until thickened. Set aside 1/2 cup mixture for sauce.

Cut pork in half widthwise; cut each half into thin strips (cutting the tenderloin into thin strips is easiest when meat is partially frozen). Thread pork strips loosely onto metal or soaked wooden skewers. Grill, uncovered, over medium-hot heat for 2-3 minutes on each side or until no longer pink, basting occasionally with remaining mixture. Serve with reserved sauce.


296 calories per serving.  Click here for more nutritional info and shopping list!

Thursday, November 6, 2014

Pumpkin Roll

A few years ago, I was asked to help coordinate the women's ministry at my church along with several of my closest friends. I'd like to think it was because we were revered for our unique and enviable feminine talents, but it's a lot more likely that we were just the only ladies who were actually willing to do it! Either way, we managed to organize some truly fabulous events for the lucky ladies of Word of Life Family Church.

Needing a break from some of my responsibilities and wanting to devote more time to some new projects, I resigned from the committee a few months ago. However, the group is headed by a tireless recruiter who does not take no for an answer, so during an innocent chat one Sunday morning I ended up agreeing to teach the ladies of the church how to make pumpkin rolls at the next ladies' event.  I'm still not sure how that sneaky bit of sorcery occurred, but here I am on a Thursday night prepping half a dozen pumpkin rolls during the commercials breaks of my favorite shows.

We chose this recipe to teach the ladies because it looks special and elegant but it seems complicated and time-consuming, so many wouldn't even consider trying it. In reality, though, it comes together fairly quickly and with a few handy tips it's not that hard to execute.

If you aren't afraid to try new things you can definitely make this on your own, but if you want some guidance, feel free to stop by Word of Life Family Church this Saturday and I'll walk you through it!


Pumpkin Roll
Prep time: 25 min Bake time: 15 min
Total time including chilling: 3 hrs
Serves 10

1/4 cup powdered sugar (to sprinkle on towel)
3/4 cup flour

1/2 tsp baking powder
1/2 tsp baking soda
1/2 tsp ground cinnamon
1/2 tsp ground cloves
1/4 tsp salt
3 large eggs
1 cup sugar
2/3 cup pumpkin puree


FILLING:
8 oz cream cheese, softened
1 cup powdered sugar
6 Tbs butter, softened

1 tsp vanilla extract

Preheat oven to 375° F. Grease a 15 x 10-inch jelly-roll pan; line with wax paper. Grease and flour paper. Generously sprinkle a thin, cotton kitchen towel with powdered sugar.

Combine flour, baking powder, baking soda, cinnamon, cloves and salt in small bowl.


Beat eggs and granulated sugar in large mixer bowl until thick. Beat in pumpkin. Stir in flour mixture. Spread evenly into prepared pan.

Bake for 13 to 15 minutes or until top of cake springs back when touched. (If using a dark-colored pan, begin checking for doneness at 11 minutes.) Immediately loosen and turn cake onto prepared towel. Carefully peel off paper. Roll up cake and towel together, starting with narrow end. Cool on wire rack.


Beat cream cheese, 1 cup powdered sugar, butter and vanilla extract in small bowl until smooth. Carefully unroll cake. Spread cream cheese mixture over cake. Reroll cake. Wrap in plastic wrap and refrigerate at least one hour. Sprinkle with powdered sugar before serving, if desired. 


341 calories per serving.  Click here for more nutritional info and shopping list!

Tuesday, October 28, 2014

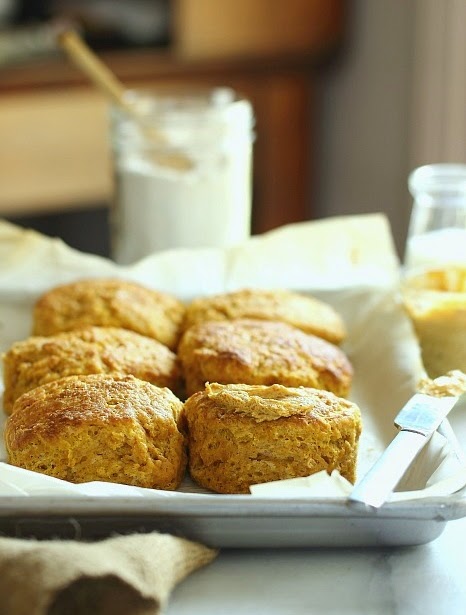
Pumpkin Buttermilk Biscuits

I remember when I was a little kid my mother served slices of white bread with every dinner.  Not exactly gourmet, but it satisfied my dad who used the bread as a kind of scoop to shovel the goods into his mouth.  I love bread of any kind; I usually stuff myself on dinner rolls whenever we go out for dinner, but I rarely make bread to serve to my own family because bread seems time-consuming and complicated. However, I have recently been trying more quick bread recipes with some really interesting results.  These pumpkin biscuits came together super quick and had a unique flavor that tasted amazing when slathered in the accompanying pumpkin butter.

Pumpkin Buttermilk Biscuits
Prep time: 15 min  Bake time: 20 min
Serves 6 
 
2 cups all purpose flour
1/4 tsp baking soda
1 Tbs baking powder
1 tsp Kosher salt
1 1/2 tsp cinnamon
A pinch of nutmeg
1 Tbs plus 1 tsp sugar
6 Tbs unsalted butter, frozen
1 cup buttermilk
1/2 cup canned pumpkin
2 Tbs milk
1 Tbs sugar
 

For the Pumpkin Butter
4 Tbs butter, softened
1/2 teaspoon cinnamon
A pinch of nutmeg
1/4 cup canned pumpkin
1 1/2 teaspoons sugar


Preheat the oven to 450 degrees F. Line a baking tray with parchment paper or a Silpat and set aside.

In a large bowl, whisk the flour, baking soda and powder, salt, cinnamon, nutmeg and sugar.  Using a cheese grater, grate the butter into the flour mixture.  Stir lightly to incorporate.  Pour in the buttermilk and gently mix with your hands or a wooden spoon until the dough just starts to come together.  Add the pumpkin and mix through the dough.


Dump the dough onto a floured work surface and gently pat until it's about 1-1 1/2 inches thick.  Using a 3 inch wide round cookie cutter, cut out 6 biscuits.  Place the biscuits onto the parchment paper, side by side. 
Keep the biscuits tight beside each other on the baking tray to ensure they rise upwards.  Glaze each biscuit with a little milk and sprinkle sugar on top.  Bake for 20 minutes.

Meanwhile, combine all of the butter ingredients in a stand mixer and beat until well combined.


Serve biscuits warm, slathered in pumpkin butter.  If you run out of pumpkin butter, regular butter and a drizzle of honey tastes great too!

381 calories per serving.  Click here for more nutritional info and shopping list!

Creamy Spiced Baked Chicken

There are some blogs I like to follow that post religiously every day or every week.  You may notice I make no promises about how often I am going to post.  That's because I don't want to post just anything but only the recipes I think are really great!  I try new recipes all the time, but only the very best make my list of keepers and end up here for you to read.  That way, you can be sure that every recipe you find here is absolutely guaranteed to please!  This tasty chicken dish is simple but amazingly delicious.  It takes a bit longer than I usually like to wait for dinner, but it was totally worth the wait.  Make sure to serve the extra sauce on the side because you will want every bite to be slathered in it!

Creamy Spiced Baked Chicken
Prep time: 15 min  Bake time: 35 min
Serves 4

8 chicken drumsticks
2 Tbs olive oil or canola oil
1 ½ tsp seasoned salt
1 onion, diced
2 tsp minced garlic
½ cup tomato sauce
2 Tbs Italian herbs
½ cup milk
½ cup heavy cream
1 tsp smoked paprika
1 tsp white pepper
2 Tbs chopped parsley
Salt to taste


Preheat oven 450 degrees.
Season chicken with seasoned salt and pepper. Place chicken in a pan with a roasting rack and bake in the oven at 450 degrees for about 15 minutes or till desired brownness.


Meanwhile, heat oil in an oven-safe skillet over medium heat.  Add onions, cook and stir for about 5 minutes, then add minced garlic and saute another minute.  Add cream, milk, tomato sauce, paprika, white pepper, Italian seasoning, parsley, salt and pepper.


Add chicken to skillet and spoon sauce on top.  Place in the oven and bake for 30-35 minutes or until chicken is fully cooked.

Saturday, October 11, 2014

Creamy White Chili

I am a summer girl. I like warm weather, shorts and flip flops, lying on the beach, and cold, fresh dinners that don't heat up the oven. Everybody else is all like, "Oohh, fall is so wonderful!" and I'm just like, "No, don't leave me, Summer!"

Fortunately, I live in the south, so even though it's mid-October it's still a lovely 82 degrees and sunny outside. Unfortunately, the fresh fruits and veggies that made such bright, crisp summer suppers are no longer in such ready supply, and my Pinterest feed is full of soups and roasts and crusty baked breads that almost make me wish it was cool enough to turn on the fireplace.

I started out slowly, with some frozen chili I microwaved and scooped onto cheese fries. Pretty darn tasty and it reminded me of summer food, something you'd get at the fair or a ballgame. Surely I wasn't inviting in winter with an innocent plate of chili cheese fries?

But then the clouds rolled in and it began to drizzle and the temps dropped by ten degrees. So I gave in and dove headfirst into fall cuisine with a hot, bubbly pot of deliciousness--my favorite creamy white chili.  Maybe I'll turn up the air conditioner tomorrow so I can have another bowl.


Creamy White Chili
Prep time: 10 minutes  Cook time: 30 min
Serves 6
 
1 lb boneless skinless chicken breasts, cut into 1/2-inch cubes
1 medium onion, chopped
1-1/2 tsp garlic powder
1 Tbs canola oil
2 cans (15-1/2 oz each) great northern beans, rinsed and drained
1 can (14-1/2 oz) chicken broth
2 cans (4 oz each) chopped green chilies
1 tsp salt
1 tsp ground cumin
1 tsp dried oregano
1/2 tsp pepper
1/4 tsp cayenne pepper
1 cup sour cream
1/2 cup heavy whipping cream

1/4 cup chopped cilantro

In a large soup pot, saute the chicken, onion and garlic powder in oil until chicken is no longer pink. Add the beans, broth, chilies and seasonings. Bring to a boil. Reduce heat; simmer, uncovered, for 30 minutes.

Remove from the heat; stir in sour cream and cream.  Sprinkle with cilantro before serving.


435 calories per serving.  Click here for more nutritional info and shopping list!

Thursday, October 9, 2014

Roasted Garlic & Asiago Chicken with Potatoes

You know how I talk all the time about how I like my recipes simple and easy? How I don't like long lists of ingredients or multiple steps of preparation? How I don't want to spend more than half an hour cooking because I'm freakin' hungry when I get off work at 5 o'clock?

Yeah, well, for this recipe, I threw all that out the window. Why, you ask, did I even consider making this recipe if it goes against everything I believe in when it comes to cooking? All I can say is, because it looked really pretty! Seriously, this is the yummiest-looking dish I've think I've ever made. Juicy chicken and savory potatoes smothered in a thick, creamy, cheesy topping? Ahh-mazing. Yes, this is complicated and takes forever, but I would make it again in a heartbeat, and so should you!


Roasted Garlic & Asiago Chicken with Potatoes
Prep time: 20 min  Bake time: 1 hr, 20 min 
Serves 6

2 heads of garlic
1 tsp olive oil 
6 potatoes, diced (peel if desired)
6 slices bacon
6 boneless, skinless chicken breasts 
Salt & pepper to taste
8 oz cream cheese
5 oz Asiago cheese, shredded
1/2 cup sour cream
1/4 cup heavy cream (or whole milk)
3 Tbs chopped fresh parsley
1/2 cup shredded mozzarella

Preheat your oven to 400° F.

Cut 1/4 inch off the top of each head of garlic, exposing the cloves, and remove most of the outer papery skin, leaving the head in one piece. Place garlic on a small square of aluminum foil, drizzle with olive oil, and wrap up in the foil.  Roast in oven for 1 hour. When done, unwrap the foil and remove the cloves from the remaining skin.


Meanwhile, place the diced potatoes in a greased 9x13 baking dish. Sprinkle with salt & pepper or your favorite garlic herb seasoning. Cover with aluminum foil and bake for 45 minutes.

Cook bacon and remove to paper towels to drain, reserving bacon grease in skillet.
Crumble bacon when cool. Season both sides of the chicken breasts with salt & pepper. Sear the chicken on each side in the bacon grease. Remove to a paper towel & set aside.

Combine the roasted garlic, cream cheese, Asiago cheese, sour cream & heavy cream in a small bowl. Take the potatoes from the oven and nestle the chicken breasts in the dish. Then, dollop the cheese mixture all over. Sprinkle with mozzarella cheese & parsley. (I did all of this the night before I wanted to serve this, stuck the dish in the fridge, and finished baking it the next day, which took a little longer since it was cold.)

Bake at 400 for 20 minutes. Sprinkle with crumbled bacon.


752 calories per serving.  Click here for more nutritional info and shopping list!

Thursday, September 25, 2014

OMG Chicken (or Pork!)

I love recipes. Shocker, right? I love finding new recipes, I love trying new recipes, and I really love when a new recipe is a total win. But you know what's even better than a great recipe? A great non-recipe!  What the heck is a non-recipe, you ask? You know, they're those "little of this, little of that" recipes that you've made a million times and you never have to look up the ingredients because you know them all by heart and the measurements just don't matter enough to actually bother measuring.

This is one of my favorite non-recipes because it's so darn easy and versatile. This recipe was originally created by Hellman's Mayonnaise and used mayo as the main topping ingredient, but my kiddo was making it and she despises mayo, so she wanted to substitute something else, even though I promised her that the end product would not taste that much like mayonnaise. I recommended sour cream, but, she doesn't like that either (I know, seriously picky!) She smartly suggested yogurt, and a new favorite was found. 

Since then, I've made it with mayo and with sour cream, and it was great every time. Yogurt is still my family's favorite, though. Sorry, Hellman's!  Today I had some extra pork chops thawed and I thought, why not?  Wanna guess how it turned out? That's right, it was AWESOME! So pick your own variation of this non-recipe and give it a try. I promise, it will make you say OMG!


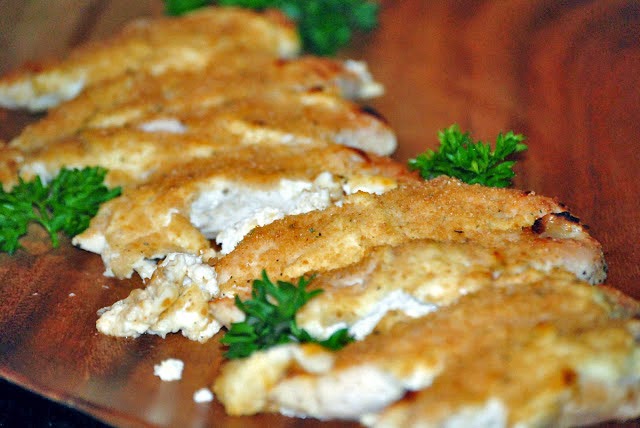
OMG Chicken
Prep time: 5 min  Bake time: 20 min
Serves 4

1/2 cup plain yogurt (or sour cream or mayo)
1/4 cup Parmesan cheese (grated or shredded)
4 boneless, skinless chicken breast halves (or pork chops)
4 tsp Italian seasoned dry bread crumbs

Preheat oven to 425°.


Combine yogurt with cheese in medium bowl. Arrange chicken on baking sheet. Evenly top with yogurt mixture, then sprinkle with bread crumbs.
 

Bake until chicken is thoroughly cooked, about 20 minutes.

201 calories per serving.  Click here for more nutritional info and shopping list!

Monday, September 22, 2014

Sweet and Sour Popcorn Chicken

I just have to laugh at my kid sometimes. Like me, she likes to go out to eat and frequently has very strong opinions about where she does and does not want to eat when we do go out. What's so funny is that, no matter where we go, she always gets the exact same thing! McDonald's, Burger King, Wendy's, Hardee's, Bojangles...it's always chicken nuggets. Any other restaurant...nuggets by another name! It really cracks me up when she says she's in the mood for Chinese food, because all she ever orders is sweet and sour chicken which is, you guessed it, chicken nuggets with sweet and sour sauce on the side!

This month, she asked me to put homemade sweet and sour chicken on the menu, and I was happy to oblige because I knew I had this great recipe she would definitely like. Now this sauce does not taste exactly like that red #5 goo they serve at most Chinese restaurants, but in my opinion, it's a lot better! Plus, I know exactly what's in it, unlike that restaurant stuff which probably contains more chemicals that actual food product. Now, this does call for store-bought popcorn chicken, but you could totally make your own if you were so inclined. Like any good Asian dish, you can personalize by adding any kind of vegetable or garnish, but it's super yummy all by itself too.


Sweet and Sour Popcorn Chicken

Prep time: 5 min  Cook time: 15 min
Serves 6

1 medium bell pepper, cubed (any color or a mix)
1 small onion, thinly sliced
1 Tbs canola oil
1 can (20 oz) pineapple chunks
3 Tbs white vinegar
2 Tbs soy sauce
3 Tbs ketchup
1/3 cup packed brown sugar
2 Tbs cornstarch
1 pkg (12 oz) frozen popcorn chicken

3 cups hot cooked white rice
Peanuts and/or crispy chow mein noodles (optional)

In a large skillet or wok, stir-fry green pepper and onion in oil for 3-4 minutes or until crisp-tender.

Drain pineapple, reserving the juice in a 2-cup measuring cup; set pineapple aside. Add enough water to the juice to measure 1-1/3 cups; stir in the vinegar, soy sauce and ketchup.

In a large bowl, combine brown sugar and cornstarch. Stir in pineapple juice mixture until smooth. Gradually add to the skillet. Bring to a boil; cook and stir for 2 minutes or until thickened. Stir in pineapple and heat through.


Meanwhile, prepare chicken according to preferred package directions. (Most brands can be microwaved, baked, or deep fried. Deep frying makes them crispy and less likely to get soggy when added to the sauce, so that's what I prefer.) Stir into pineapple mixture. Serve over rice. Sprinkle with peanuts and chow mein noodles if desired.


388 calories per serving.  Click here for more nutritional info and shopping list!

Sunday, September 14, 2014

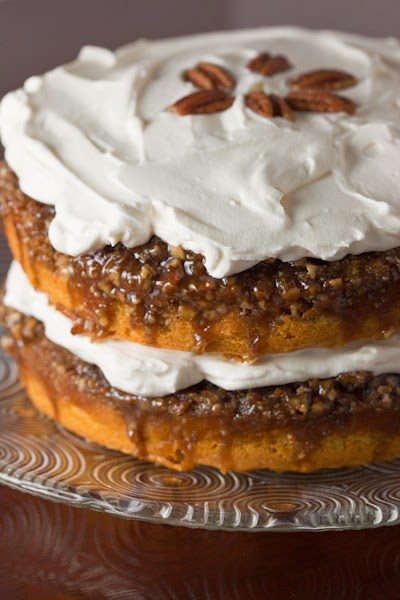
Praline Pumpkin Layer Cake

This is America, land of opportunity. We believe in the freedom to make our own choices and we perpetuate that philosophy by offering every choice under the sun! I mean, seriously, have you been to Walmart lately? There are like 50 varieties of peanut butter, for heaven's sake!

But too many choices can definitely be a bad thing. It just makes life way too complicated. Take my Pinterest dessert board for example. I love dessert, so at least half my pins are sweets. Sounds awesome, but when it comes time to actually make something, it's a nightmare! It takes me an hour just to scroll through all my pins, let alone pick one.

I had company this weekend and I promised I would make dessert, so I began the laborious process of searching through my recipes for the perfect one. Usually, I'll pick three or four that look really good then spend half an hour debating which one would be the best choice. When I finally do pick one and start making it, I second guess myself and wonder if one of the others would have been better! Quite a mind warp, for sure.

But this time was different. When I saw this recipe, I knew it was the winner. It's made from a cake mix, so it's simple; it's got pumpkin AND pecans, so it has a great fall flavor; and it looks beautiful even if you have no idea how to work a piping bag. Now that's all-American!


Praline Pumpkin Layer Cake
Prep time: 15 min  Bake time: 45 min
Serves 16 

1/2 cup butter or margarine
1/4 cup whipping cream
1 cup brown sugar
3/4 cup pecans, chopped
1 box yellow cake mix
1 cup canned pumpkin (not pie mix)
1/2 cup water
1/3 cup vegetable oil
4 eggs

1 tsp pumpkin pie spice


FROSTING:

4 oz cream cheese, softened
1/2 tsp vanilla
1 cup powdered sugar
1 cup whipping cream

1/2 tsp pumpkin pie spice

Heat oven to 325°F. In 1-quart heavy saucepan, stir together butter, whipping cream and brown sugar. Cook over low heat, stirring occasionally, just until butter is melted. Pour into two ungreased 9- or 8-inch round cake pans; sprinkle evenly with 3/4 cup pecans.

In a large bowl, beat cake mix, pumpkin, water, oil, eggs and the pumpkin pie spice with electric mixer on low speed until moistened, then on medium speed 2 minutes, scraping bowl occasionally. Carefully spoon batter over pecan mixture in each pan.

Bake 41 to 47 minutes or until cake springs back when touched lightly in center. Cool 5 minutes; remove from pans to cooling rack. Cool completely, about 1 hour.


Using an electric mixer, beat the cream cheese, vanilla, and sugar until light and creamy.  Beat in  1/4 cup whipping cream until smooth (scrape and stir with spatula as necessary). Add the rest of the cream and pumpkin pie spice and beat until it has the consistency of whipped cream (don’t overmix). Spread half of the frosting between the two cake layers then spread the rest over the top layer.  Decorate with pecan halves if desired. Store loosely covered in refrigerator.

325 calories per serving.  Click here for more nutritional info and shopping list! 

Saturday, September 6, 2014

Fruity Chicken Wraps

 I work in an air-conditioned office, drive an air-conditioned car, and come home every night to an air-conditioned house, but yet in the summertime I still avoid using the oven like the plague.

I love sandwiches and traditional wraps made with tortillas, but those carbs can add a lot of extra calories. This recipe is all about the filling, so a simple romaine leaf is the perfect wrapping for these fresh and fruity roll-ups. I had a little trouble rolling them up because my leaves were small and had a very stiff center vein, so I ended up just eating them taco style, but who doesn't like tacos, so that was fun too!

I precooked my chicken in the Crock-Pot with a few shakes of McCormick Chicken Seasoning, but you could easily use leftover chicken or grill some up in a flash in a George Forman grill. I think this tastes better with cooled chicken, though, so I strongly recommend letting your chicken chill for a few hours before assembling these.

The original recipe called for almond butter, which I had never used before, and it was very tasty, but not that different from peanut butter, so if you don't feel like buying an extra ingredient, feel free to substitute your favorite peanut butter instead.
 

Fruity Chicken Wraps
Total
time: 10 min 

Serves 3
 
1 cup cubed cooked chicken
1/2 cup Fuji apples, chopped
1/2 cup red grapes, halved
1 1/2 Tbs honey
4 Tbsp almond butter (or peanut butter)
6 romaine leaves

In a medium bowl, mix honey and almond butter until smooth. Stir in chicken, apples and grapes. Spread mixture on romaine leaves and roll up or eat taco style.

223 calories per serving. Click here for more nutritional info and shopping list.

Chicken Cordon Bleu

We always had a microwave at our house as far back as I can remember, but I don't recall my parents ever using it for anything other than heating up leftovers. It's a shame, really, because when the microwave was first invented there were all kinds of recipes popping up that took advantage of this technological wonder. What happened?  Why did we give up on the microwave as a versatile kitchen appliance and relegate it to nuking ramen noodles and Lean Cuisines?

I have just recently been trying more recipes that utilize the microwave, with quite satisfactory results. Sure, you have to understand a little about how it works and what it can and can't do, but it can do a lot more than you think! Plus, it is super quick, saves energy, and doesn't heat up the house like the oven does.

Make this dish in your "nuker" and I bet nobody would ever guess.  Even the cheese sauce can be made in the microwave! I am definitely going to remember that the next time I want mac and cheese. Of course, you can always bake this in the oven if you want a little crispier coating, or if you are afraid of microwaves cooking your insides like the chocolate in Percy Spencer's lab coat pocket, but if you want to expand your microwave horizons, give it a try!


Chicken Cordon Bleu
Prep time: 15 min  Cook time: 20 min

Serves 4

2 boneless skinless chicken breasts 
2 tsp Dijon mustard
1/2 tsp paprika
8 thin slices deli ham
1/2 cup shredded Swiss cheese
1 cup Italian seasoned bread crumbs
1/4 cup grated Parmesan cheese
1/4 tsp pepper
3 Tbs mayonnaise

SAUCE:
1 Tbs butter
1 Tbs flour
1 cup milk
1/4 tsp salt
1/2 cup shredded Swiss cheese
2 Tbs white wine


Butterfly each chicken breast into 2 pieces and flatten to 1/4 inch thickness. Spread mustard on one side; sprinkle with paprika. Top each with 2 ham slices. Sprinkle with cheese. Roll up tightly and secure with toothpicks.

In a small bowl, combine the bread crumbs, Parmesan cheese and pepper. Brush chicken with mayonnaise then roll in crumb mixture.


Place chicken in a shallow 2 quart microwave-safe dish; cover loosely. Microwave on high for 7 minutesTurn chicken and cook 5-1/2 minutes more or until meat is no longer pink. Alternately, you could bake this in the oven at 350
°F for 30 minutes. Remove toothpicks and keep warm.

For sauce, place butter i
n a 1 quart dish and heat in the microwave on high for 20 seconds. Stir in flour until smooth. Cook for another 20 seconds. Slowly whisk in milk and salt and cook 2-3 minutes longer or until thickened. Stir in cheese until smooth then add wine. Serve over chicken.

Saturday, August 30, 2014

Apple Fritter Casserole

It's Labor Day weekend, and that means September has arrived--time for back to school, (slightly) cooler temps, and apples! It doesn't really start to feel like fall here until about November, but I start craving apple recipes just as soon as I see all those shiny, new school supplies.

I love a good apple pie as much as the next guy, and I have some nice recipes for apple cakes, breads and donuts, but this recipe is an interesting combination of all of those. I can't decide if it's breakfast or dessert, so I ate it for both!


Apple Fritter Casserole
Prep time: 20 min  Bake time: 25 min
Serves 12

5 apples, peeled & chopped
6 Tbs butter
1 cup brown sugar
1 tsp cornstarch
2 Tbs water

5 large croissants (about 12 oz)

1/2 cup heavy cream
1/2 cup apple butter
1/8 tsp ground cinnamon

3/4 cup powdered sugar
4 Tbs heavy cream


Melt butter in a large sauté pan over medium heat. Add brown sugar and stir until completely incorporated. Transfer chopped apples to pan and stir until coated with sugar mixture. Cook for 5 minutes while stirring frequently. In a small bowl, stir together the cornstarch and warm water. Add the cornstarch mixture to apples and continue to cook/stir for 5 more minutes. Remove from heat and set aside while prepping the other ingredients. The apples should be soft and the liquid will be a syrup consistency.

Preheat oven to 375°F
Whisk together the heavy cream, apple butter, eggs and cinnamon. Spray 9x11 casserole dish with non-stick spray. Slice the croissants in half across middle. Place the bottom halves of the croissants in an even layer. Pour half of the apple butter/cream mixture over the croissants. Top with half of the caramelized apple mixture. Arrange the croissant tops in an even layer. Top with the remaining cream mixture and apples. Pour all of the syrupy apple mixture over the casserole. Gently press down on the top with a wooden spoon or spatula. Bake at 375° for 25 minutes, or till lightly browned on top.


Mix powdered sugar and heavy cream together with a fork until smooth. Drizzle over the finished casserole.


320 calories per serving.  Click here for more nutritional info and shopping list!
 

Wednesday, August 27, 2014

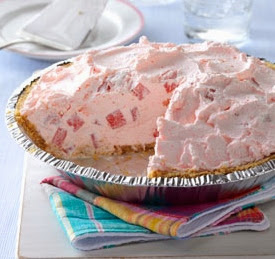
Creamy Watermelon Pie

Is it weird that I'm posting another watermelon dessert recipe less than 2 weeks after the last one?  I just can't help it; I love watermelon in the summer! Don't worry, September is almost here and that means all things apple, quickly followed by pumpkin season, then peppermint and gingerbread for Christmas....there's always another season coming up with its own set of flavors! But for now, I'm going to savor the last juicy melon of the summer in this amazing pie.

This is great for that end of summer watermelon that's not quite as sweet and tasty as earlier ones, and it's also perfect for this super busy time of the year when complicated recipes are just not gonna happen.  I've made this many times before and I plan to serve it this Labor Day because it's quick, cool, and everybody loves it. The only thing challenging about this recipe is finding the watermelon-flavored gelatin. Last year I tried several stores with no luck, but a buddy of mine found it and bought me several boxes because she knew how much I love to make this pie!


Creamy Watermelon Pie
Prep time: 10 min  Chill time: 2 hrs 
Serves 8

1 box (3 oz) watermelon gelatin
1/4 cup boiling water
1 tub (12 oz) frozen whipped topping, thawed
2 cups diced seeded watermelon
1 (9 inch) graham cracker crust


In a large bowl, dissolve gelatin in boiling water. Cool to room temperature. Whisk in whipped topping; fold in watermelon. Spoon into crust. Refrigerate for 2 hours or until set.

Wednesday, August 20, 2014

Honey Ham Biscuit Sliders

I've been trying to teach my 14-year-old daughter to cook by having her help me make dinner every night. After a few years of this, I decided to have her cook one meal a week all by herself. So far, she's been doing great and learning important new things every week, like how to manage her time, how to make substitutions on the fly, and how to avoid setting the kitchen on fire! She's become quite adventurous and will sometimes tackle recipes that would scare away the average home cook.

Of course, I think it's great when she can create an amazing gourmet meal, but I also want her to learn some simple recipes that she can make when she goes to college or moves out on her own and doesn't have the time for anything grand. Too many people rely on the drive-thru when they need a quick meal because they don't have a collection of quick and easy recipes they can make instead. This came together in just a few minutes, used ingredients we almost always have on hand, and everybody thought it was yummy, so I can definitely see it on her monthly rotation from now on.


Honey Ham Biscuit Sliders
Prep time 5 min  Bake time: 15 min
Serves 5


1 can biscuits (10 count)
1/2 lb deli ham, shaved
1 cup shredded Swiss cheese
1/4 cup honey mustard dressing
1 Tbsp butter, melted
2 Tbsp honey

Preheat oven to 400
°F. Lightly spray a 9-inch pan with cooking spray.  Set aside.

Separate each biscuit into two layers. Spread each layer with honey mustard and top with Swiss cheese. Place half of the biscuits, cheese side up, in the bottom of prepared pan. Top with ham. Top ham with remaining biscuits, cheese side down. Brush biscuit tops with melted butter.

Bake 12-15 minutes, until golden brown. Heat honey in microwave for 20 seconds. Brush biscuit tops with warm honey. Serve immediately. 


293 calories per serving.  Click here for more nutritional info and shopping list!

Tuesday, August 19, 2014

Coconut Lime Grilled Chicken

 Nobody who knows me would ever consider me a risk-taker. I plan everything weeks in advance, always read the directions, and don't like roller coasters or extreme sports or even haircuts that take off more than half an inch. But when it comes to making dinner, I'm dauntless! (shameless plug for my daughter's current favorite movie, Divergent)

It's seems like a lot of people are afraid of trying new recipes, but to me, a recipe is not really a gamble. If I know I like all the ingredients and I follow the directions correctly, I'm almost guaranteed to have a good result. I'm notorious for constantly trying new recipes and I'm not even afraid to try them when it really matters, like when I'm having a dinner party! That's exactly what happened last night when I decided to try out this recipe on my unsuspecting friends. As I expected, it turned out great and it even left my hands smelling like a tropical paradise all day!


Coconut Lime Grilled Chicken
Prep time: 5 min (plus 2+ hrs marinating) Cook time: 10 min
Serves 4

1 1/2 cups coconut milk
3 cloves garlic, finely chopped
1 tsp grated ginger
1/2 cup fresh cilantro
juice of 1 lime
3 Tbs soy sauce
1 Tbs fish sauce
1 Tbs brown sugar
4 chicken breasts

In a food processor or blender, combine coconut milk, garlic, ginger, cilantro, lime juice, soy sauce, fish sauce and sugar. Process until smooth, about 30 seconds, to make marinade.


 If chicken breasts are very thick, butterfly them in two or pound to 1/2 inch thickness. Place chicken in a large ziptop bag and pour in marinade. Refrigerate for at least 2 hours. Drain chicken, reserving marinade. Bring leftover marinade to a boil in a small saucepan.

Preheat grill, then brush lightly with oil. Grill chicken until tender, 4-5 minutes each side. Baste chicken with reserved marinade while grilling and drizzle chicken with extra marinade when serving.


328 calories per serving.  Click here for more nutritional info and shopping list!

Wednesday, August 13, 2014

Maple Dijon Chops

Have you ever noticed the difference between men and women when it comes to food? I think women's palates are kind of like their brains - complicated and going in a million different directions at once. We like casseroles and one-dish meals with unique combinations of flavors and textures while men prefer simple entrees with bold and distinct flavors - a slab of meat and a pile of potatoes. Don't get me wrong, I can certainly appreciate a simple piece of meat, but it gets so boring after awhile! I mean, a pork chop pretty much always tastes the same, doesn't it?

Not if you marinate it in this amazing combination of flavors then grill it for even more smoky deliciousness! This recipe is a perfect compromise for me and my husband--a big hunk of meat for him and an exciting flavor combination for me!


Maple Dijon Pork Chops
Prep time: 5 min (plus 1 hr marinating) 
Cook time: 15 min 
Serves 6

6 pork chops, bone-in
1/4 cup Dijon mustard
1/4 cup maple syrup
2 Tbs brown sugar
2 cloves garlic, minced
1 shallot, chopped
1 tsp each salt, pepper, and thyme
1 Tbs drizzle oil (this just helps them to not stick on the grill)

Combine all  ingredients in a large zip-top bag and let marinate for at least one hour--the longer the better!

Preheat grill to medium-high then grill chops 5-6 minutes per side till at least 135°F. Remove to serving plate and cover with foil; let rest 10 minutes. Temperature should continue to rise. Make sure pork reaches 145°F to ensure doneness.

418 calories per serving.  Click here for more nutritional info and shopping list!

Tuesday, August 5, 2014

Turkey & Cranberry Spread Croissants with Grilled Peaches

Don't you just love simple suppers? You know, the kind that only take a few ingredients, whip up in minutes, and dirty just a few dishes? Yeah, I know, that's a pretty rare combination! Usually I try to blog about interesting recipes--the kind that look complicated and gourmet, draw oohs and ahhs, and will impress your friends and family.

This supper was none of those things, but it was so quick, so easy, and so yummy, that I figured maybe you would appreciate it just as much as I did. This is actually three recipes in one, though, so maybe that makes up for its simplicity. Make each one separately or make them all at once, but definitely make them!


Turkey & Cranberry Spread Croissant Sandwiches

Total time: 5 min
Serves 4

4 large croissants, split
1 batch cranberry walnut spread (recipe below)
8 oz shaved turkey
4 slices Swiss cheese
1/2 cucumber, sliced
8 lettuce leaves

Spread cranberry spread on insides of croissants then top with turkey, cheese, cucumber slices and lettuce.


Cranberry Walnut Spread

Prep time: 5 min
Serves 4

4 oz cream cheese, softened
4 Tbs cranberry sauce
2 Tbs chopped walnuts
1 Tbs honey
1/8 tsp ground cinnamon
 

Stir cream cheese until smooth then blend in remaining ingredients.  Serve as a dip for veggies or crackers, spread on a sandwich, or just eat by the spoonful! 


Grilled Peaches

Total time: 10 min
Serves 4

4 peaches, halved and pitted
4 Tbs honey
8 scoops vanilla ice cream

Preheat grill. Grill peaches flesh side down for 4 to 5 minutes over low flame. Flip and grill for an addition 4 to 5 minutes. Do not let skin blacken.

Remove and drizzle with honey. Serve warm with a scoop of vanilla ice cream.


Monday, August 4, 2014

Marissa's Pancit

Did you miss me?! It seems like I haven't blogged in forever! It's been a crazy couple of weeks for me at work and the stress followed me home like a stray puppy dog and took up residence in my brain like a flea infestation. I barely had the energy to make supper, let alone blog about it. Life is slowly normalizing again, so I decided I owed you all a really great recipe to make up for my month-long absence.

This dish is really nothing "special," but it is oh-so-yummy. This is a traditional Filipino recipe that I learned from my stepmother who makes it for my husband every time we visit because he loves it so much. I finally got the recipe from her and now I can make it for him whenever he wants--or at least whenever I can find pancit noodles at the Asian store. They were out for weeks! In a pinch you can use angel hair or rice vermicelli, but the real thing is always the best. Like all my favorite recipes, this comes together super quick and, amazingly, even my picky kid likes it!


Pancit Bihon
Prep time: 15 min  Cook time: 15 min
Serves 6

16 oz pancit bihon noodles
2 Tbs oil
1 boneless, skinless chicken breast, thinly sliced
2 chicken bouillon cubes dissolved in 2 cups water
1 onion, sliced 
3 cloves garlic, crushed and minced
1/4 cabbage, sliced into small strips
1 carrot, sliced into strips
3/4 cup snow peas (or red peppers)
3/4 cup diced celery
3 Tbs soy sauce
Salt and pepper to taste

1 Tbs lemon juice (juice from half a lemon)

Soak the noodles in water for 10 minutes to soften.

Meanwhile, saute chicken in 1 tablespoon oil till lightly browned.  Remove and keep warm.  Saute vegetables in remaining tablespoon of oil till slightly tender, about 5 minutes.

Return chicken to pan with vegetables. Drain noodles and add to chicken and veggies. Pour in bouillon water and soy sauce and simmer till noodles are tender. Add salt and pepper to taste and squeeze lemon juice on top.

353 calories per serving.  Click here for more nutritional info and shopping list!